Revit BlogA place for Revit updates, Revit news, and Revit information. Archives
March 2016
Categories
All

|
8/28/2013 NEW REVIT TEMPLATE TOOLSAre you sick of setting up and coordinating your phase filter with your phase. These options can beconfusing: Show all, Show Complete, Show Demo + New, Show New, Show Previous + Demo, Show Previous + New, and Show Previous Phase. You know you need an existing phase to put in the existing conditions. Then you need a demolition view to show what you will be demolishing, and then finally you can start on your new design! If you are in the beginning stages there might be a lot of dimensions, and tags that you don't need to show your clients. Because of this we have also made a Presentation view. All of this work and set-up has been done for you! We now have:
Views ready to go for each level! 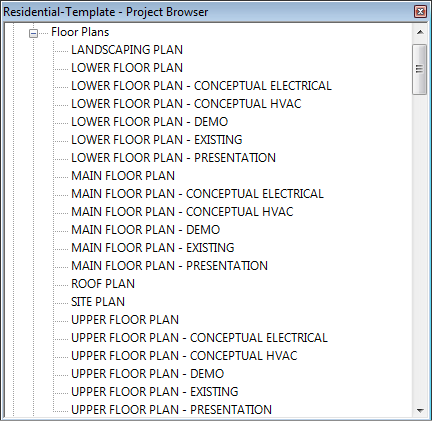
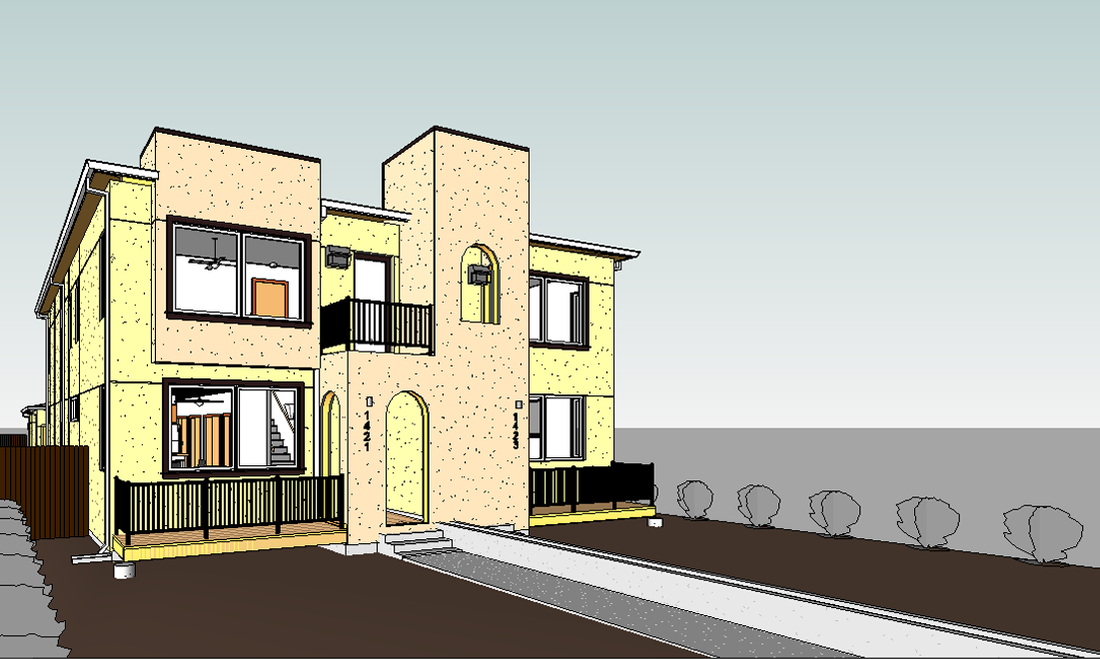
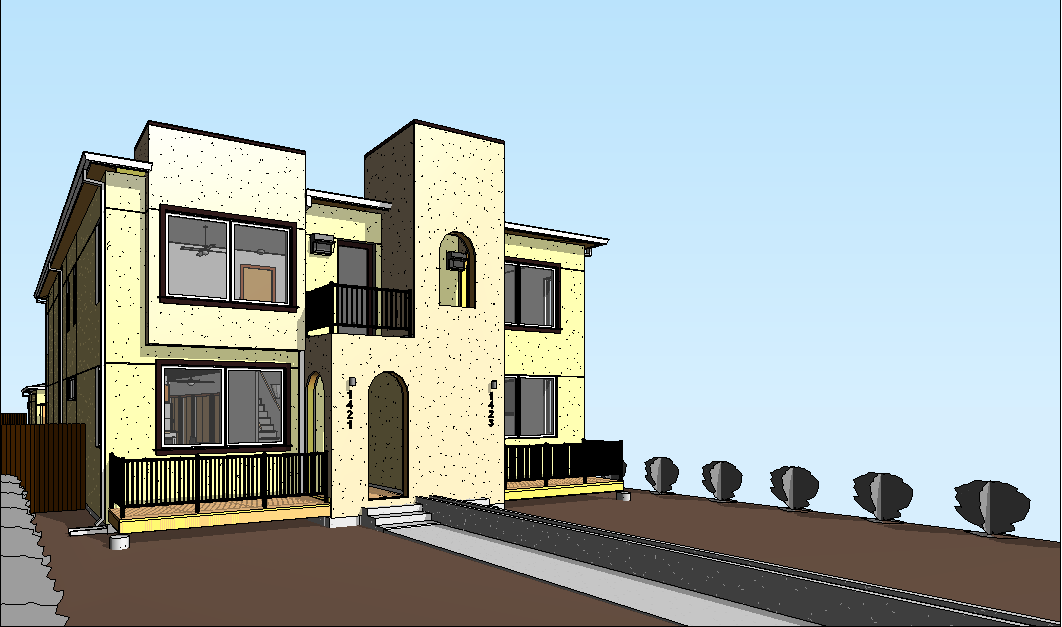
we has also added: Good Looking Revit ViewsTake a look at the standard Revit Gradient Views vs. the ones that come in our template.
Click here to view our template! Lastly, please if you enjoyed this post:
Please LIKE / TWEET on Facebook or Twitter! and leave a comment below and let us know what you think!
1 Comment
Last night after work I decide to put together a little video on how to get started in Revit. In this video we work with our template, but if you have your own this video should also help out. In this tutorial I cover:
I was prodded by one of the purchasers of our templates to make this video and I am glad that I did. But this is my first video and I feel it is really rough, so feel free to leave feedback. Did you like it or hate it, did it help, where could I improve., ect..? You can find Revit Templates by clicking here. Lastly, please if you enjoyed this post:
Please LIKE / TWEET on Facebook or Twitter! and leave a comment below and let us know what you think! I am often looking though recent graduates portfolios and I find myself looking at their techniques and design skills, but most importantly I am looking for is their Revit design skills. One of the first things I see that lets me know this person is a novice, is when they use the out of box Autodesk Revit title blocks for their project. The title block looks like this below: 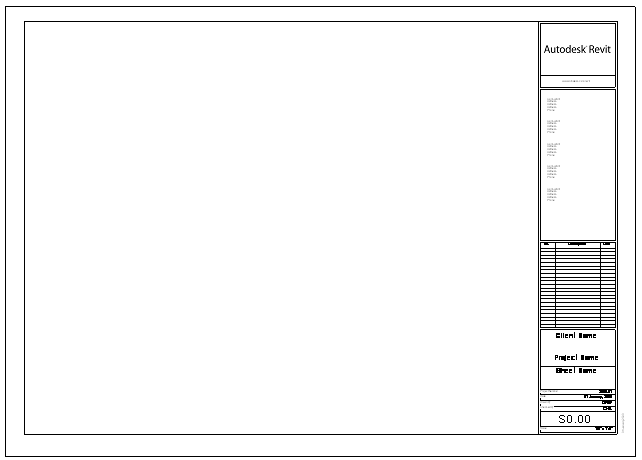 Whether you are presenting yourself professionally or as a student you want to look as put together as possible, and the out of the box Revit Title block does not do this. The first step when you start your first Revit project is to scroll down to one of your sheets, click on the title blocks and then click the Edit Family button on the top of your screen. Then proceed to changing your template to your suiting. Take this a design problem and make your title block your own. After you are done with all of your changes, load your title block back into your project and you are ready to go! I will be teaching at the University of Colorado this year, and everyone of my students will be doing this exercise. 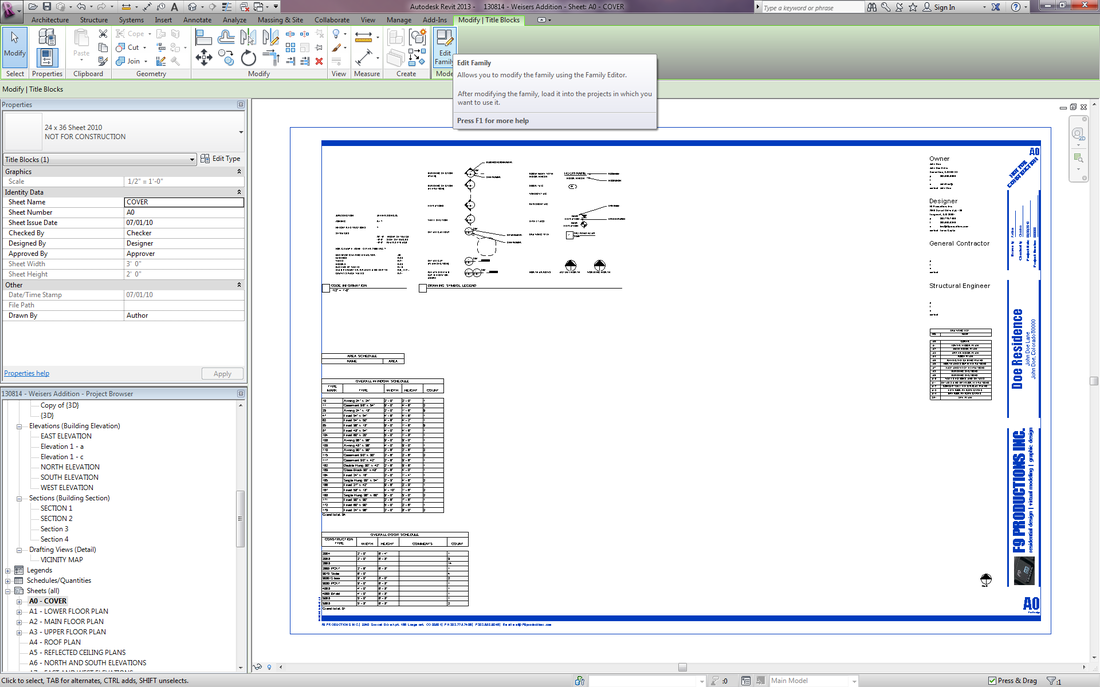 Here are some things to consider: · Create a logo for yourself, a company name, and add your contact information. · Have your client's name, address, and even contact information. · Include project information such as, Author, Checker, Project Date, and project number. · Add your webpage link Take a look at some of the examples below, and read this article and the comments on title blocks, by Neal Pann: http://naparchitect.com/blog/2013/8/5/title-blocks Diving even further, the Revit Kid, has created a tutorial for editing Title Blocks. It is embedded here for your convince. Take a look: Here are some useful links: Autodesk Title Block Help : http://wikihelp.autodesk.com/Revit/enu/2013/Help/00001-Revit_He0/1468-Document1468/1926-Prepare_1926/1956-Title_Bl1956 Downloadable Title Blocks : http://www.cadblocksfree.com/index.php?id=78 Thanks for reading. Please comment or share any cool examples of title blocks you have found. Lastly, please if you enjoyed this post: Please LIKE / TWEET on Facebook or Twitter! and leave a comment below and let us know what you think! Have a good day,
- Alex |
 RSS Feed